Waders & Boots | Layers | Packs | Rods | Reels | Accessories | Flies
Your first line of defense against what can be frigid water temps should be a good one. Here's our top picks.
Patagonia Swiftcurrent Expedition Zip Front Waders
These are Patagonia’s fully featured, top of the line waders, and they don’t leave much to desire. They feature an internal waterproof pocket, two front fly box pockets, small side hand warmer pockets, and a waterproof front zipper. They are made with durable, 100% recycled, polyester microfiber H2No® Performance Standard shell with a waterproof/breathable barrier and a DWR (durable water repellent) finish. They are made with single-seam construction for durability and a gusseted crotch for freedom of movement and comfort. They have a 4 layer upper and lower all with a dwr finish. Some find these too heavy for the warmer, summer months, but as water temperatures cool down the protection against the elements that the Swiftcurrent Expedition's provide is extremely welcome.
Patagonia Swiftcurrent Expedition Zip-Front Waders
Simms Confluence Waders
"The new Confluence waders from Simms have been a welcome addition to the Simms line of waders. With 4-Layers of Toray on both the upper and lower, durable neoprene knee construction for extra abrasion resistance, and plenty of storage, these are a versatile pair of waders that will hold up great in the fall months."
-David Bower TCO Reading Store Manager and Fly Fishing Guide
The Patagonia Forra Wading boots are built for long hikes to the water and the slick rocks that lie below it. These boots are slim and minimalistic yet aggressively designed when needed, and the large surface area of the Vibram Mars sole and the HexaBase lugs on the outsole combine for maximum grip and stability. These are an awesome new boot here at TCO in 2023 that are now many of our go to options.
Read our full review of the Patagonia Forra Wading Boots here.
Patagonia Forra Wading Boots
Layering gives you the freedom to vary your level of insulation, and provide the warmth you need when fishing in the harshest of conditions.
"When it comes to staying warm during fall fly fishing. Layering is of the utmost importance. Patagonia’s Nano Puff jacket is the perfect synthetic insulation layer to have on for fall. You can keep it on for the cool morning chill, and then easily pack it into your bag once it warms up outside. The Patagonia Nano Puff Hoody is one of my most used layering pieces. Not only does it keep you warm, It’s also extremely light and packable. Perfect for cold mornings, and easy to stow away when not in use."
- David Bower TCO Reading Store Manager & Fly Fishing Guide
"Early morning guide trips on the ocean can be pretty cold, not to mention wet! The Simms Bulkley Jacket has become my go-to piece. It's not only insulated, it's waterproof. The adjustable sleeve cuffs help make the fit perfect. If you haven't experienced the warmth and function of an insulated, waterproof jacket and have just been adding more layers under a waterproof shell, this jacket will change your thinking and comfort level."
- Capt. Jeff Coen Relentless Fly Fishing Saltwater Guide
Waterproof packs have become an excellent way to keep things dry and safe when out on the water. It can be important to have a waterproof pack to keep things safe when you are carrying extra insulation layers, gloves/hats, or electronics like a camera or phone. Here are our top choices for waterproof packs this fall:
Fishpond Thunderhead Submersible Sling Pack
With the change in seasons comes unpredictable weather and circumstances. If you’re going to be wading deep, or are packing in extra insulation/things you need to keep dry, the Fishpond Submersible packs are the perfect option.
Orvis Pro Waterproof Packs
We’d recommend these Orvis submersible packs over the Fishpond ones if you needed some extra room to carry some bulkier things like a jacket, gloves, hat etc.
Simms Tributary Hybrid Chestpack
Sometimes, less is more out on the water. The Simms tributary hybrid chestpack fits that bill perfectly. This little pack is one of our favorites to come out recently. It’s simple, yet has the perfect amount of well placed features. It can hold just the right amount of gear, and is perfect for lightweight fall excursions. Plus, it is only $99.99.
Simms Tributary Hybrid Chestpack is a great minimalist pack option that is new in Fall of 2023
The Orvis Clearwater is simply the best rod for the money. For just $249.00 you get high quality feel, amazing casting ability, and great versatility. We'd recommend this rod for any time of the year really, but the versatility of the 9' 5 weight Clearwater shines in the fall months as you can go from slinging articulated streamers to indicator nymphing with ease.
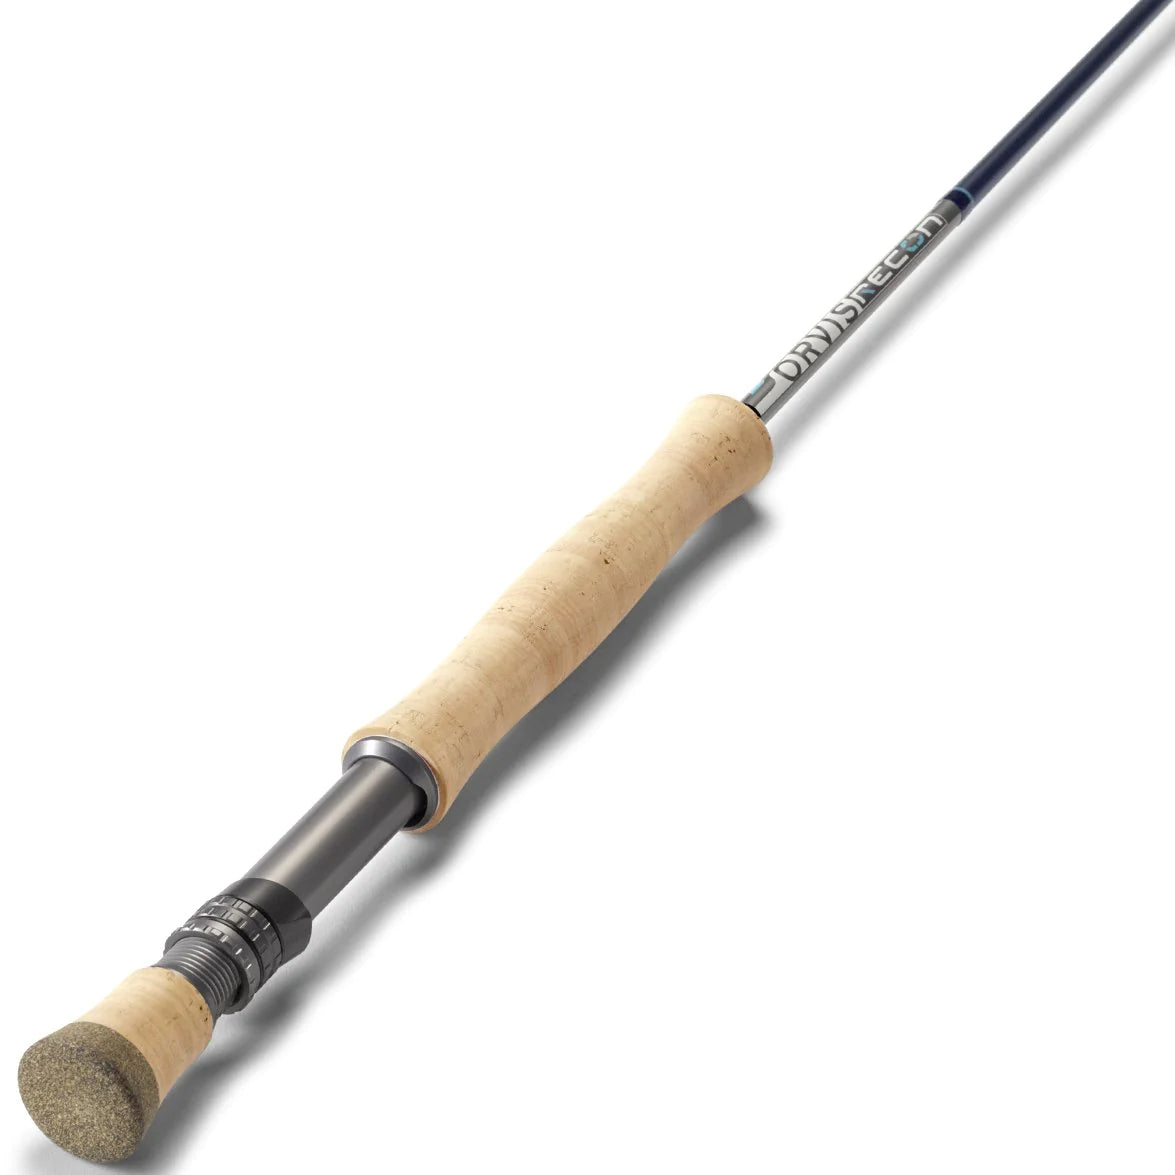
Fall still presents great Euro Nymphing opportunities and jig streamers can be extremely effective with aggressive trout. If you're in the market for a euro nymphing rod this fall, you won't be disappointed with the Diamondback Ideal Nymph Rod selection.
Diamondback Ideal Nymph 10'10" 2 WT
"My favorite rod and the one that I’m currently using the most is the Diamondback Ideal Nymph Rod 10’ 10” #2. Whether you’re throwing two 2.0 mm bead nymphs, a dry dropper system, or a jig streamer, it’s incredible tippet protection and sensitivity will get the job done."
- David Bower TCO Reading Store Manager & Fly Fishing Guide
Orvis Helios 3D 9' 7 Weight
The Orvis Helios 3D 907 provides enhanced power and exceptional accuracy to the streamer focused fly angler. Whether you are throwing floating line and small weighted streamers or sinking lines and articulated monsters. The 907 has enough power to get your flies to their destination and is light enough not to blow your arm out casting all day.
Orvis Helios 3D 9' 7 Weight
"For steelhead fishing on Lake Ontario tributaries, I'd recommend a seven weight rod that's ten feet in length. 8 pound tippet is the norm, with certain conditions calling for 10 pound, and low, clear and cold conditions requiring 6 pound. The longer rod has a deeper flex and protects the light tippet. You'll find a ten foot rod allows you to anchor a roll cast when fishing clunky indicator rigs. 10 foot rods also allow more line control across different seams and current breaks- so you can achieve a drag free drift."
-Neil Sunday Relentless Fly Fishing Guide
"If you're committing to steelhead fishing, and plan on putting in some days each season, you may find two-handed rods are the way to fish. Swinging flies to steelhead is considered by many to be the ultimate thrill in steelhead fishing. For this, a seven or eight weight rod that is 11 to 13 feet in length works well on Lake Ontario tributaries."
-Neil Sunday Relentless Fly Fishing Guide
Two-Handed Steelhead Rods:
Check out our full Steelhead gear guide
Neil Sunday Releasing a Great Lakes Steelhead
Lamson Liquid & Remix 3 Packs and Individual Reels are 30% Off this Fall
This fall, Lamson has their Liquid and Remix reels on sale, available in three packs and individual reels. These reels were already a great value option, and were some of the best reels for the price. Now with 30% off, it's a no brainer. Be sure to check out this sale this Fall.
Shop Lamson Fall Clearance Collection
Darn Tough makes great socks for hunting which are perfect for under waders. They provide excellent warmth while remaining breathable. The heavyweight style is for the coldest conditions, but if you regularly suffer cold feet in waders these could be a good solution. Plus, they are guaranteed for life, and if you ever get a hole in them, they’ll hook you up with another pair.
Simms Merino Thermal OTC Socks
The Simms heavyweight thermal socks are perfect for keeping your feet warm in the cold water temps that come with fall, and when steelheading. They rise up over your calf for extra support and warmth, and are made of merino wool.
Simms Merino Thermal OTC Socks Heavyweight
Hi-Vis Products
It's extremely important to stand out when fishing in game lands during hunting season. There are some great hi vis options to choose from by Simms, Patagonia, Buff, and more.
Shop our collection of Hi-Vis Products.
The Fall presents a dynamic season when it comes to choosing fly patterns. You will likely want to carry a variety of dry flies and nymphs, and likely some more streamers than usual as the streamer bite starts to pick up in the fall season. Check out our blog on the Best Fall Fly Patterns for Trout to help narrow down your options.
Also, be sure to check out our Best Fall Fly Patterns for Trout Collection.
Fall is an excellent time to be out on the water. However the cold weather and water temperatures can cut your day short if you're not prepared. Make sure to gear up right, so that the only thing from keeping you from the water is you. Which of these gear options do you plan on picking up this fall season?
]]>
Although most people think of trout fishing as taking place in the spring, the fall months can present trout fishing opportunities that rival spring conditions. Excellent streamer fishing opportunities open up as trout bulk and become more territorial prior to the winter months. Plus, fall hosts its own share of insect hatches that are worth getting out on the water for. See what TCO Bryn Mawr Employee and Relentless Fly Fishing guide John Parisi advises filling your fly box with before you hit the water this Fall season.
Now that fall is here it’s a great time to go through your fly selection and take inventory of what you need as the temperatures start to drop. There are a lot of changes taking place in our rivers this time of year. Our terrestrial insects are dying off, water temperatures are dropping, brown trout are spawning, there is a lack of heavy insect hatches, and there is an abundance of baitfish, just to name a few. Due to this, it is important to reevaluate your fly patterns and adapt to the changes in our waters. My nymph selection won’t change much, but I do bring a much larger variety of streamers out with me, and I always bring a condensed assortment of dries as well.
Let's dive into each pattern type and see what the best fall fly patterns are for trout.
Here are some of my top dry fly patterns for fall:
" The fall presents opportunities to target large trout as they seek to bulk up and keep their territory free from unwanted visitors. "
With the lack of aquatic bugs hatching, trout start to look for other high protein foods items. Sculpins, darters, leeches, and crayfish all start to become a larger portion of their diet. Our brown trout are fall spawners so they can get a little territorial as well. Due to this, the fall presents opportunities to target large trout as they seek to bulk up for the winter months and keep their territory free from unwanted visitors.
Streamer fishing can be great year round, however, fishing a streamer through the fall months can be especially rewarding. I usually put streamers into two separate categories, either small jig/nymph style streamers or larger articulated streamers. The jig/nymph style can be fished in a variety of ways with almost any size fly rod. I tie them from 1-3” long with a tungsten bead or cone for weight. They are the most versatile because they can be stripped in, dead drifted, or even fished with a euro nymphing setup. Larger articulated streamers like game changers need at least a 5 weight rod or larger to fish them well, and often perform best with a sinking rod. I usually save these for larger rivers or high muddy water, perfect for targeting trophy sized fish.
Best Jig/Nymph Style Streamer Patterns for Fall:
Croston’s Micro Rabbit Sculpin Natural or Olive
Larger Streamer Patterns for Fall
Bank Robber Sculpin Gray | Olive
Mini Drunk and Disorderly Chartreuse & White | Orange & Olive | Olive & Gold | Grizzly | White
Although Fall is an excellent time to move big trout to a large streamer, you are going to want to be prepared with a variety of nymph patterns as well. Nymphs make up a large portion of a trout's diet year round, so you should be well equipped with some confidence nymph patterns any time you're trout fishing. Euro nymphing remains a highly effective method of fishing into the fall and winter months.
If you're looking for more information on euro nymphing, be sure to read our blog on What is Euro Nymphing by Frank Landis.
I always carry plenty of blue winged olive and midge imitations throughout the year, and that doesn’t change in the fall. Little bwo’s can hatch in big numbers on overcast drizzly days and trout will feed heavily on emerging nymphs as the hatch gets started. If I see any adult bwo’s on the surface, I’ll fish a pair of small thread body nymphs until trout start looking up. Zebra midges and small perdigons are some of my favorites in low water. I lean towards thin profile flies in clear water, size 16-20 seems to be the sweet spot. If we get some heavy rain and the visibility is bad, I’m less concerned with “matching the hatch” so I’ll fish brighter nymphs with hotspots like a sexy walts worm or blowtorch. Stonefly nymphs work great in higher flows or larger rivers, they also live for multiple seasons so they are always on the stream bottom in various sizes. Our spring creeks have plenty of scuds/cress bugs that are active year-round and can be a day saver if there’s not many bugs hatching.
Here are some of my top nymph patterns for fall:
Zebra Midge Red | Black | Olive
Hot Rib Walts Tan | Cream | Gray | Olive
Shop our Best Fall Fly Patterns for Trout Collection
Fall is a great time to get out on the water. You get spring like conditions without the crowds and pressure, and fish are focused on bulking up prior to the winter months.
Which of these fly patterns are you excited to try out this fall season?
]]>
Secure bead to the hook.
Secure the thread. Push the bead back towards the bend of the hook and secure some 16/0 Veevus thread in brown to the hook shank right behind the hook eye.
Tie in the gills. Grab some white Antron yarn and place it against the hook shank at a downward angle facing you and take a pinch wrap to secure the yarn in place. Draw the yarn back toward hook bend until the yarn sticks out over the hook eye about one hook eye in length. Once satisfied with the length of the gills, take three or four tight securing wraps to secure the yarn in place. Trim the excess yarn behind the bead off flush and whip finish the thread. Jam the bead right behind the hook eye as shown below.
Tie in the body. Secure some Veevus body quill in claret to the hook shank.
Tie in the rib. Secure some small silver wire to the hook right behind the eye.
Form the body. Wrap the body quill in touching turns back towards the hook bend. Go deep down into the bend and then go back up the hook shank until you’ve reached the bead. There should be no silver wire showing. Whip finish the body quill and resecure the Veevus 16/0 brown thread behind the bead.
Rib the body. Take the silver wire and rib the body using open spiral wraps up the body. Secure the wire and then helicopter the excess free.
Select a single peacock herl and tie it in behind the bead. Take several wraps with the herl to produce a bulbous thorax. Tie off the herl with a few securing wraps.
Add a dab of super glue to the thread. Here I'm using Loctite Brush On.
Whip finish the fly.
]]>
The Patagonia Forra Wading Boots are a new product that us at TCO Fly Shop are very excited about. Some of us were lucky enough to have early access to these boots, and an opportunity to test them out before they came to market. We decided we would share some of what we found about these boots with you! Here's our Patagonia Forra Wading Boots Review!
The Patagonia Forra Wading boots are built for long hikes to the water and the slick rocks that lie below it. These boots are slim and minimalistic yet aggressively designed when needed, and the large surface area of the Vibram Mars sole and the HexaBase lugs on the outsole combine for maximum grip and stability.
These boots have a unique design when compared to the competition. The arch of the sole is much different than traditional wading boots. You may also be surprised by the thick tread, and the upper fabric’s thin profile, which is much different than the thicker foam uppers of most wading boots.
The made in Italy Forra wading boots leave nothing to question when it comes to quality. They are expertly designed and made of high quality materials, making them trekking and wading machines that are built to last!
The Patagonia Forra Wading Boots are a lightweight wading boot made for both the trail and river. The supportive, high collar upper is made of abrasion-resistant Cordura® nylon mesh for quick-drying and lightweight support. They feature an aggressive Vibram Mars with XS Trek compound tread, which offers best in class traction while remaining incredibly lightweight. Seriously these boots have no business offering the performance they do at only 40.99 ounces. Once out of the water, these boots will not hold you down. They are designed to drain water quickly, and it is free from unnecessary foam and backers for much faster dry times.
Some of us at TCO were lucky enough to get our hands on the Patagonia Forra Wading Boots ahead of time. We all put these boots to the test and fished them in different waters and situations. Ultimately, we were all extremely happy with the Forras, and it is now some of our go-to wading boots.
We found the tread to have great traction, even without studs, thanks to the Vibram XS Trek Compound. Once studded, we can imagine these boots will have some of the best in class traction.
Additionally, we found the lightweight and sleek design of the upper to be a welcome feature, and the boot remains lightweight when wet thanks to its quick draining capabilities. We didn’t find ourselves missing the foam uppers of other wading boots, and we found that the high collar of the Forras offered great ankle support. This will be especially helpful to those of us who often find ourselves hiking into fishing locations, and don’t want our heavy wading boots holding us back from where we want to fish.
Patagonia is known to create products of the highest quality, and we found these boots to meet and surpass those standards. They feel and look great, and allow us to take on our fishing adventures with confidence.
"We have a ton of small streams in Pennsylvania and I spend the majority of my time wading/hiking so I was happy to try out the new Forra wading boot from Patagonia. The first thing I noticed was how light they were, which isn't surprising since Patagonia is having these made by an Italian company named Fitwell that's known for making high end hiking/mountaineering footwear. They definitely have a hiking boot feel with a well defined arch. The upper is made of a heavy duty mesh that conforms to the ankle and seals out any rocks or gravel that might make it past your gravel guards, the mesh also means they dry faster than usual. I noticed they don't hold much water so there isn't a drastic weight change when wet. They have an aggressive vibram sole that works well in and out of the water and a rubberized toe cap for extra protection. They seem to run true to size but if you fish in the cold going up one size would help fit a thicker sock. I got 11's and usually wear a size 10 sneaker. Overall I think they did a great job on these and I'm looking forward to putting some more miles on them"
-John Parisi TCO Bryn Mawr Retail Sales Associate & Relentless Fly Fishing Guide
“Incredible grip for the weight of the boot!
The new Forra boot from Patagonia truly makes wading more enjoyable for me! Patagonia teamed up with Fitwell, an Italian brand, to create their new-lightweight Forra boot. Patagonia designed these boots to feature a built-in arch within the Vibram sole. Finally! A wading boot with an arch!
The arch feature provides me increased comfort and stability over long days out fishing. The beefy Vibram sole of the Patagonia Forra boot (almost two inches) has plenty of rubber cleats and spots to insert metal studs. At first, the additional elevation of the sole took a bit of getting used to, but it comes in handy when I wade deep.
The boots’ unique rubber cleat construction allows anglers to grip round, slimy rocks with ease. The Forra’s cleats and arch feature team-up to grant me the ability to generate lots of traction with the balls of my feet and my heels. The ankle support appears thin and loose to the eye, but once the boots are laced up, the boots do a fantastic job keeping my ankle stable and cozy.
The Patagonia Forra boots feature a material and buildout that allows water to pass in and out of the boots more freely. This will force the boots to drain quickly, and the additional water weight does not slow me down! If an angler finds themself transitioning from wading to walking often, the Patagonia Forra Boot is a great pair of boots for them to consider.
The one knock on these boots is simple. Sinking lines and dirtier fly lines often get stuck on the protruding cleats close to the arch of the boot. Fly line loves to get trapped on anything it can, and this is no different.”
-John Dwyer TCO Reading E-Commerce Team Member
“I have been testing a pair of Patagonia Forra wading boots for about four months now and have taken them to a variety of destinations. They have all of the attributes that I look for in a boot. They are lightweight, have good ankle support, and great traction. I wore them on some major hike in days and they were spectacular. I plan to stud them this fall for steelhead season. Additionally I find them to be nice and roomy which will be great for an all season boot when heavy socks are required. Well done Patagonia!”
-Chris Frangiosa TCO Fly Shop Head of Operations
"Incredible grip for the weight of the boot!"
In conclusion, Patagonia did an awesome job with the new Forra wading boots. The unique design and thoughtfully placed features all in a durable build make these some of the best on the market. If you like to get off the beaten path to get to your fishing spots, or you just want an all around great boot that combines lightweight comfort with support, durability, and traction, the Forras might be for you. Check them out here.
]]>10 Best Fly Fishing Accessories Under $50 Collection
We’ll start off this list with a recent new product from Fishpond. The Shallow Magpad Fly Puck looks very similar to the fly pucks previously released by Fishpond, but as the name suggests, the pad of the puck is all magnetic, keeping your files securely in place when you're in and out it. Some people love them, while others prefer the organization of a fly box, but we at TCO think these pucks are a great option for fly and/or gear storage, and the magnetic base of the magpad puck is a convenient and effective feature. These are especially useful for the angler who keeps their gear load lightweight, and values accessibility and functionality over organization and options.
Fishpond Shallow Magpad Fly Puck is great for holding a collection of flies.
The O’Pros Third Hand Rod Holder is a seriously underrated accessory. Say goodbye to the goofy ways you used to hold your fly rod when undoing tangles, changing flies, switching rigs, or any other action that requires more than one hand, (there’s a lot). O’Pros Rod Holder allows you to stash your rod into a clip that secures to your wading belt, holding it in place, completely hands free. It only takes one hand to secure and remove it for easy access and stowing.
“The O’Pros Third Hand Rod Holder is great for when you are changing flies, unhooking a fish, or carrying an extra rod for that anticipated hatch!”
Jacob Gilliland TCO Fly Shop Boiling Springs Retail Associate and Relentless Fly Fishing Guide
Zingers are a simple product that make fly fishing so much easier. Being able to grab your gear with ease and then simply letting them hang from your pack or waders is much more convenient than stowing all of your tools in zippers and bags. Zingers keep your essential tools within reach at all times. This Zinger from Loon outdoors is well constructed and offers 22 inches of reach with its steel cable retractor. It clips on easily and securely, giving you peace of mind. This is certainly one of the top options for zingers at only $14.00.
Loon Rogue Zinger paired with the Loon Classic Nippers with comfy grip.
This isn’t exactly a deep dive in the fly fishing accessory world, but we do love our Oros indicators. Oros’s are strike indicators/bobbers that screw directly on to your leader/tippett. They are surprisingly lightweight, easily rigged and removed, and give you the ability to fish different depths within seconds. Not to mention, they are easily visible and offer great strike detection, even in fast and choppy water.
“The Oros Strike Indicator solved 3 main problems I had with indicator fishing, the first being line wrap. By allowing the leader to pass through the middle of the indicator, it keeps the Oros balanced. The second problem I had with this type of fishing was losing caps. Those little things find their way to the bottom of your pack or into the stream which renders the indicator useless. The split ball design makes it easy to find when separated, or pick up when you drop them. Finally, I hated the feeling of losing a plastic indicator on the stream. The Oros indicators are biodegradable, which gives me peace of mind should I end up losing that indicator due to my poor knot tying skills.”
Setting up an Oros is a simple process that takes mere seconds.
The Piopod Trash Container from Fishpond is an excellent way to keep your waste and trash where it belongs - out of the water. Whether it’s microscopic pieces of tippet, granola bar wrappers, or little pieces of plastic that we find on the ground, we can help to keep our waters clean by making sure it gets into our Piopod container. The Piopod easily attaches to fabric loops or belts and conveniently attaches to a d-ring or fishing lanyard.
“The Fishpond Piopod is a great way for anglers to manage waste, leader, and tippet material. The compact size allows it to be easily carried on any pack system while maintaining ample room for spent line. Whether trimming tags or swapping tippets, the Fishpond Piopod provides anglers with an efficient system to eliminate waste on the water.”
Fishpond's Piopod clips on easily to your pack or wading belt.
Simple, inexpensive, and effective, the classic comfy grip nippers from Loon Outdoors are our favorite for the money. A good pair of nippers are essential out on the water, and you don’t usually realize it until you lose or break yours. Thanks to Loon’s visible design and durable build, you don’t need to worry about that!
Loon Comfy Grip Nippers hanging from Loon Rogue Zinger
Like a good pair of nippers, you don’t want to be on the water without a nice pair of forceps. They come in handy in a multitude of ways - crushing barbs, removing hooks from fish, removing hooks from your wading belt, etc. These forceps have built in scissors for versatility, and are equipped with a hook-eye cleaner. Applications of this product are abundant, and they can be a lifesaver out on the water.
Orvis Scissor Forceps Works as Forceps, Scissors, and Hook-eye cleaners.
The New Zealand strike indicator system is the most effective indicator fishing setup. Using wool as an indicator offers superior strike detection and more delicate presentations than an airlock or Oros. It is made with sheep’s wool, which keeps your indicator lightweight and delicate yet extremely buoyant. The strike indicator tool makes constructing your indicator rig quick and easy, with its ingenious tubing mechanism that secures the wool to your leader or tippet.
"I love using the New Zealand strike indicator wool. It’s super visible and easy to use…well, easy now that I found a place to keep the tool it comes with; I attached it to my zinger with my nippers. Now it’s never lost and I can get to it easily."
You did everything right, the perfect cast, delicate presentation, that perfectly timed mend that didn’t disrupt your drift at all. The fish takes, and you set, then you feel that pit in your stomach form as you realize you missed that fish. The reality is, fish hardly ever “miss” their target. It is more likely that your hook simply didn’t set right into the mouth of the fish. Keeping your hooks sharp can be the difference between a good day on the water and an unforgettable one. For just $10.00 the Loon Hook Hone is a must buy, and needs to be a part of your setup! Sharpen those hooks! Catch more fish!
Sharpened hooks will lead to more fish landed.
If you’ve been around fly fishing for a while, you probably know that at certain water temperatures you need to stop targeting trout, and spend some time fishing warm water species or preparing for the cooler temperatures that come with fall. As a general rule of thumb, we suggest not fishing for trout at water temps above 67 degrees Fahrenheit. The only way to know this is to of course carry a stream thermometer. The Umpqua Stream Thermometer features a durable aluminum case and attaches to a zinger easily with a lanyard. Most importantly though, it will accurately tell you the temperature of the water, and help you make aneducated decision of whether or not you should be targeting trout.
Umpqua Stream Thermometer
There we have it, the top 10 accessories for fly fishing. Ultimately, this list is subjective, and may very well be different for every angler. If you are just getting into fly fishing however, these are some excellent products to start out with. Let us know in the comments what you think we missed, and what your top accessory choices are!
TLDR: 10 Best Fly Fishing Accessories Under $50 Collection
Just like mayflies, caddis are an abundant food source in trout streams around the United States. If you're nymphing, we have some of our favorite pupa patterns here. If the fish are keyed on emerging caddis, we have those too. And, we have adults as well as adult cripples if the fish are keyed in on the later stages of the hatch. What the trout are most interested in eating can vary from hour to hour and day to day, so you'll want to be sure to have all stages covered because you never know what you'll run into. Additionally, make sure to have each pattern represented in a range of sizes and colors as well. Though we only have one size per pattern listed, many are available in a number of sizes. So, search the pattern in our search bar if you're looking for a different size.
Caddis pupa are an easy meal for trout. They vary in color and size, and are easily represented by a handful of patterns in a couple of colors. If you don't know what's on your river, start turning over some rocks.
This is one of the most important stages of the hatch to get right. Maybe you see rises, but the fish aren't taking dries? That's because they're keyed on emergers. They're an easy meal. If you're not sure, take a good look in the surface fim, or just under.
Caddis fly in an erratic way, and bounce on the water when they deposit eggs. If you see bugs acting this way and splashy rises to match, it's time to tie on a dry.
Keep your eyes on foam lines and back eddies. These are an easy meal for trout, and they'll be eager to eat them.
]]>For many fly anglers tarpon are a bucket list species. If you’re like us, you probably have images of them going airborne seared in your brain. Seeing a fish of that size in the air is something you can’t simply get out of your head. We want catching one of these amazing fish to become a reality for you, so we’ve laid out a list of our top tarpon flies.
The Tarpon toad is one of the most revolutionary tarpon patterns out there. It was designed to swim like a baitfish, rather than jig up and down like most other flies used at the time. This allowed it to be fished in front of fish for longer. The Millhouse tarpon toad differs from the standard version because the tail is only Marabou.
From Signature Tier Andy Mill, this shrimp pattern is offered in both Olive and Tan. Designed through years of fishing the Florida Keys, it excels in clear water with picky fish.
This fly has fantastic movement underwater. Tied on the Owner Aki, if you’re lucky enough to hook a Tarpon, then this will at least hold it! A great pattern, fun to fish and effective too. As with all flies, the hook really is the most important component, especially when it comes to big saltwater species. Why compromise?
When it comes to tarpon fishing, few know it as well as David Mangum. His Tarpon Bunny variation with a dragon tail off the rear is a must have in any tarpon angler’s fly box.
]]>
The Walt’s worm is one of my most productive flies in my fly box and has been for many years. What’s even more profound is it’s nothing more than dubbing on a hook. Who knew that this fly would become such a staple in many anglers’ fly boxes across the country. This fly originated in central PA and was created by Walt Young many decades ago. I had the honor to meet Walt at the Lancaster Fly Fishing Show back in 2017. Since that encounter, my curiosity and confidence in the Walt’s worm has soared to new heights, even to the point of fishing two of the same pattern in different hook and bead sizes and/or fishing two different colored dubbed bodies at the same time. By changing the size of the hook and bead, and changing the color of dubbing of the body, you can fill an entire fly box of this tasty little nugget and start your trout season off on the right foot. I think this pattern is effective for many reasons. The first is that it resembles a lot of staple food sources for trout. It can imitate a cress bug, caddis larva, or cranefly larva for starters. Secondly, it has a very buggy look which is enticing to hungry trout. The rabbit dubbed body with spikey guard hairs adds movement to the fly, while the subtle Antron flash piques the trout’s interest. Finally, it is very easy to tie and requires very little time at the vice, so anglers are eager to fish them deep and not so worried about losing them to the bottom of the stream. We are going to be tying two versions of the Walt’s worm in this tutorial. The original Walt’s worm (Walt Young) and the Sexy Walt’s worm, a flashier variation created by Loren Williams which has become a staple in many competitive fly anglers’ boxes. Thanks for joining along. Let’s get to tying the flies.
Materials list:
Walt's Worm
Hook: Fullingmill Jig Force 5045, size 18 or TCO-C660BL, size 18
Bead: Slotted Tungsten Bead, 7/64 or 2.8mm - Copper
Body: SLF Squirrel Spikey Dubbing, Natural Fox or Hare's Ear Plus Dub, Hare's Ear
Thread: UNI 8/0, Olive Dun
Sexy Walt's Worm
Hook: Fullingmill Jig Force 5045, size 18 or TCO-C660BL, size 18
Bead: Slotted Tungsten Bead, 7/64 or 2.8mm - Silver
Body: SLF Squirrel Spikey Dubbing, Natural Fox or Hare's Ear Plus Dub, Hare's Ear
Thread: Veevus 10/0 - Fl. Orange
Flash: Micro Flashabou Opal Mirage
Secure the bead onto the hook small hole first and place securely into the vice of your choice. Here, I am using a Fulling Mill Jig Force hook in size 18 paired with a 2.8mm slotted tungsten bead in copper.
Secure your thread to the hook by making a couple of jam wraps directly behind the bead. Here I am using Uni 8/0 thread in Olive Dun but any thin tan or brown thread will work just fine for this pattern. The goal is to use thin thread to keep the body relatively thin. Clip the excess thread.
Build a taper with your thread so that you have a smooth body transitioning from thin at the back end of the fly to thicker towards the bead as shown. When you finish building a taper, leave your thread hanging at about the hook barb (The hook I’m using is a barbless hook).
Grab a pinch of dubbing from your favorite dubbing of choice. (NOTE: The best dubbing to use for a Walt’s worm is a rabbit fur/Antron blend such as Hare’s Ear plus #1 from Hareline. Regular hare’s ear dubbing works as well as SLF Spikey Squirrel dubbing in Natural Fox. Here, I am using a rabbit fur/Antron blend. You can also blend your own dubbing by trimming the fur off of a hare’s mask and mixing it with Antron to produce your own custom dubbing blend. Make a thin dubbing noodle a couple of inches long and proceed to wrap the noodle with touching turns up the hook shank to right behind the bead. Because we already built the taper with our thread, your body should be tapered as shown.
Whip finish the fly. For all of my Walt’s worms, I like to do a double whip finish for extra durability. Once finished, trim the excess thread free. I will usually trim the overly long guard hairs with scissors but generally like to leave the body as buggy looking as possible. You have completed the first fly. It’s that simple!
Secure the bead onto the hook small hole first and place securely into the vice of your choice. Here, I am using a Fulling Mill Jig Force hook in size 18 paired with a 2.8mm slotted tungsten bead in silver.
Secure your thread to the hook by making a couple of jam wraps directly behind the bead. Here I am using Veevus 10/0 in Fl. Orange. This will be used to not only form the fly but also create the hot spot directly behind the bead. The goal is to use thinner thread to keep the body relatively thin. Clip the excess thread.
Grab a piece of flash material of your choice and secure on the near side of the hook. Here I am using a piece of opal mirage micro flashabou. Secure the flash all the way back to just shy of the bend of the hook.
Build a taper with your thread so that you have a smooth body transitioning from thin at the back end of the fly to thicker towards the bead as shown. When you finish building a taper, leave your thread hanging at about the hook barb (The hook I’m using is a barbless hook).
Grab a pinch of dubbing from your favorite dubbing of choice. (NOTE: The best dubbing to use for a Sexy Walt’s worm is Hare’s Ear plus #1, SLF Spikey Squirrel dubbing in Natural Fox, or a rabbit fur/Antron blend). Again, I am going to be using a rabbit fur/Antron blend. Make a thin dubbing noodle a couple of inches long and proceed to wrap the noodle with touching turns up the hook shank to right behind the bead. Because we already built the taper with our thread, your body should be tapered as shown.
Grab your piece of flash and begin to counter wrap it up the hook shank with open spiral wraps towards the bead. Make sure that when you wrap, the first wrap goes underneath the hook shank. This will give the flash more protection and make your fly more durable. On this size hook, you should get about four evenly spaced wraps. When you reach the bead, secure the flash with a few tight turns of thread, and trim the excess free.
Take a couple of extra thread wraps to produce a nice hot spot of orange thread behind the bead. Once complete, whip finish the fly. For all my Sexy Walt’s worms, I like to do a double whip finish for extra durability. Once finished, trim the excess thread free. I will usually trim the overly long guard hairs with scissors but generally like to leave the body as buggy looking as possible. You have completed the second fly. Again, very simple, but very deadly!
Thanks for following along with this month’s fly-tying tutorial. I hope this fly treats you just as well as it’s treating me! Tight lines.
Jacob Gilliland works in the TCO - Boiling Springs shop and is a fly fishing guide for Relentless Fly Fishing. To find out more about Jacob, check out his TCO Fly Fishing bio and his Relentless Fly Fishing bio.
Call TCO at 717-609-0169, ext 5 to book a trip, or contact Jacob via email: Jacob@tcoflyfishing.com.
]]>We’re counting down the months until we’re standing in a river with bugs hatching all around us with trout rising to them. Whether you find yourself fishing mayflies, caddisflies, stoneflies, or another bug entirely we added many new dries to our range that’ll help you fool trout this season. We added many dozens of patterns, but follow along for our top 10 new dry flies for 2023.
Designed by Signature Tier Tom Rosenbauer, the Sneaky Spinner is a rusty spinner variation on a bent shank hook. This imitates a spent mayfly in a realistic manner and proven for very fussy trout. Because trout see a lot of conventional straight shanked hooks, the added bend will often fool them where a standard hook will not.
Ken Burkholder gave us this Pink PMD pattern and it’s a good one. Barred mallard for the tail, a heavily segmented body and a good wing profile. This little dandy, when the time is right, is a killer fish catcher.
Signature Tier Ken Burkholder has spent many years fishing the brown drake hatch, and he’s come up with some great imitations in the process. This year he added three of them; A dun, a cripple and a spinner. They all have their place in the hatch, and should be staples in your dry fly box.
Signature Tier Paul Procter is a dry fly specialist who lives in the UK. His Active Green Drake Dun is a fantastic representation of a freshly emerged dun that is drying its wings. This pattern is tied with a large wing profile, which mimics the act of the dun flapping its wings to dry them in preparation for flight. When fishing it, give it some twitches and hang on tight!
Signature Tier Keegan Berrett gave us this Western March Brown cripple pattern, which he’s been fishing on the Henry’s Fork for years. When there’s a heavy hatch going on cripple patterns are usually the best way to go as fish key in on struggling insects. Usually they’re the easiest meal, so they’ll select them over more active adults.
Designed by Signature Tier Josh Miller, the Clueless Caddis gets it’s name from how it is intended to be used. To fish it, place it on a long dropper tag above a weighted nymph. This allows you to bounce it around like an egg laying caddis. When you do this, it looks a bit confused and clueless. Additionally, this method can trigger some truly explosive strikes from fish that aren’t even looking . Don’t be without these in your dry box.
The guys at Fly Fish Food are at it again, this time with the Palomino Caddis. The name is derived from the extended body which is found on a Palomino Midge pattern. The design fits nicely into this caddisfly. A pearly body gives this pattern an attractor component, which triggers fish to eat. On top of that, the CdC and Elk Hair combo give this fly an extremely buggy profile.
You’ve almost certainly heard of Tom Rosenbauer’s famous Rabbit’s Foot Emerger. Refined over the past 30 years, this pattern has proven it’s worth time and time again throughout the nation. It rides low in the surface film, and is extremely effective when representing an emerging insect.
Just as the Salmonfly version of this bug, this pattern is subtle in color compared to a lot of other flies on the market. Sometimes fish get a bit shy to the more vibrant patterns, which is when Libby’s Golden Stone really shines. Plus, is extremely buoyant and has an silhouette that fish will chase down.
It has arrived! Ken Burkholder’s famous Bearback Rider, this time in a salmon fly coloration. A bombproof bug for fishing the Salmon fly hatch in the West. This high floating bug is one of the best imitations we’ve ever fished. Not only is it a sandwich of high floating foam, its knotted legs are set in just the right way to put that killer silhouette on the water which triggers explosive takes. You do not want to be without this pattern when you’re chasing those big bugs.
This is one of those patterns that is sure to cure trout fever during those long winter days where spring is just around the corner. These stoneflies are some of the first bugs to hatch for the year and this marks the start of the early spring season. This particular fly is a great early season pattern and it simply catches fish. The realistic profile and the movement from the rubber legs really sold me on the fly and the trout don’t seem to mind it either! I like to fish this fly from a size 14 down to an 18. You’ll want to adjust the size of the legz as you scale down in hook size. You can also try fishing it in different colors to imitate early brown stoneflies, golden stones, giant stoneflies, or yellow sallies. The sky is the limit. I would like to give a shout out to the Lively Legz crew for coming up with the original pattern. I made some minor adjustments but the overall design is theirs. Kudos! This pattern is not only fun to tie, but fun to fish. Give it a try!
Hook: Tiemco TMC-2302 or TCO 200R - Size 14
Bead: Plummeting Tungsten Bead 7/64" - Matte Black
Thread: Veevus 12/0 - Black
Tail/Antennae: Sili Legs, Nymph - Black
Body: Wapsi Small Stretch Tubing or Micro Stretch Tubing - Black
Thorax: Hareline Dubbin - Stonefly
Wing Case: 1/8" Sow Scud Back - Black Stone or Thin Skin - Black
Legs: X-Small Lively Legz - Black
Step #1: Place the bead onto the hook small hole first and place the hook securely into the vice of your choice.
Step #2: Slide the bead back towards the bend of the hook and secure your thread to the hook right behind the eye. Trim the excess thread off.
Step #3: Tie in the antenna. Take a piece of black sili leg material (nymph size) and fold the material over to make a small loop. Place the loop directly on the top of the hook shank so that the loop extends past the hook eye. The length of the antenna is personal preference. Take a pinch wrap with the thread to secure the loop and then a couple more material locking wraps with the thread. Trim the excess material off and set aside. Whip finish the thread and trim the excess. Shove the bead back up to right behind the hook eye. Cut the already formed loop in half. Ideally, the material will splay out at about a 45-degree angle as shown.
Step #4: Tie in the tail. Reattach the black thread to the hook. Trim the excess. Grab the sili leg material used to form the antenna and make sure the two ends are aligned. Secure these ends right behind the bead and work them back deep into the bend of the hook. Trim the material to length. Again, the material should splay naturally. If it isn’t spreading out enough, just take your thread and bring it between the tails and manipulate the material to where you want it to lay. Wrap your thread back up to the bead.
Step #5: Tie in the body. Take a piece of micro stretch tubing in black and tie it in right behind the bead and work the tubing back to the base of the tails. Make sure to secure the tubing to the far side of the hook. Wrap your thread back up to about the halfway point on the hook shank.
Step #6: Wrap the body. Take your micro tubing and make touching turns around the hook shank starting at the base of the tails and working up towards the bead to form perfect segmentations. The more tension you apply to the tubing, the flatter it will lay. For more defined segments, loosen the tubing as you wrap.
Step #7: Tie in the wing case. Take a piece of 1/8” black scud back and secure right behind the bead. Work the material back to where the body ends. Make sure there are no gaps. Take your thread back up to the bead.
Step #8: Tie in the lively legz. To secure the legz, place them directly on top of the hook shank so that they are laying flat. Make sure the front legs are facing forward as shown. We will be using all three sets of legs in this pattern. Take three tight wraps of thread in front of the first set of legs. Take another three tight thread wraps behind the first set of legs. Wrap in between each set of legs until they are secure. Make sure your legz do not rotate off to the side. When finished, clip off the back tab and front tab.
Step #9: Dub the thorax and form the wing cases. Make a tight dubbing noodle with your black rabbit dubbing and dub around the back set of legs. Fold the scud back over the back set of legs to form the first wing case and secure with a few wraps of thread. Fold the scud back towards the bend and make a couple more wraps of thread.
Step #10: Repeat Step 9 with the middle and front set of legz. When it’s all said and done, you should have three distinct wing cases and a completely dubbing thorax that’s slightly bulkier than the abdomen of the fly. When you get to the front of the fly, secure the scud back with tight thread wraps and trim the excess off.
Step #11: Whip finish the fly. Trim the excess thread.
Step #12: Reinforce the thread wraps with UV resin. Here, I am using Loon UV Flow and curing with my Loon Infinity light.
Thanks for following along! Tight lines!
Jacob Gilliland works in the TCO - Boiling Springs shop and is a fly fishing guide for Relentless Fly Fishing. To find out more about Jacob, check out his TCO Fly Fishing bio and his Relentless Fly Fishing bio.
Call TCO at 717-609-0169, ext 5 to book a trip, or contact Jacob via email: Jacob@tcoflyfishing.com.
]]>
Designed by the guys at Fly Fish Food, their Oil Slick Buzzer was the inspiration behind this little gem. Boy, does this little bug work! The UV CDL tail fibers along with a flashy body and our UV Metallic Pink tungsten bead make for a knockout combination. This is a phenomenal searching pattern that stands out especially on overcast days.
The Full Metal Jacket is the ultimate combination of extra weight and slim profile. World Champion Angler Howard Croston’s innovative bead fixing method with our Tungsten Drop Beads ensures that this fly is extremely heavy, but still slim. This is no small feat. On top of that, the combination of materials on this pattern make for a fantastic imitative look, with just the right amount of flash to catch a trout’s eye. This nymph will get down into the strike zone faster than just about anything else, and will fool them time and time again.
This is a micro version of the standard Full Metal Jacket. It incorporates the same bead fixing method, but is instead finished as a simple perdigon. This pattern is available in a size 22 with a 3.2mm Tungsten DropBead, and will sink faster than anything in your fly box.
This simple chenille worm utilizes our Tungsten Drop Bead in the center of the hook shank. Additionally, the bead is painted with a hot spot for a fluorescent pop. This allows it to be level when sinking, and it rides similarly through the drift.
Like your favorite lucky penny, Pat Weiss’ Penny Perdigon will bring you good fortune while on the river in any fishing situation. This little magic nymph seems to work in any condition throughout the year. This color and profile does a great job of representing a host of mayfly species, so is a great option whenever mayflies are active in the drift regardless of the specific hatch.
Pat Weiss’ CDC Possum nymph is a great choice for searching new waters or pressured waters alike. Like his CDC Skunk, this pattern features a small pearlescent flashback, just a touch of Ice Dub for the thorax and a small hot thread collar to finish it off. The anchor version of this pattern, comes in one bead size heavier than the standard per hook size.
This is Fulling Mill Technical Manager Eric Kelley’s version of the Walt’s Worm. He double ribs these with GB floss followed by a mono counter-rib to protect the floss. Tied with an extra slim body, these get down where they need to be and fast.
This is a cracked back perdigon from Signature Tier George Daniel. This patterns is meant to imitate sulphur mayfly nymphs in the eastern US and PMD’s in the West. This is a fast sinking pattern that should be right at home in your nymph box.
This is Signature Tier Josh Keslar’s ultimate searching pattern. When you’re blind fishing in heavily pressured waters this is a great anchor fly as it’s subtle, with the slight pop of a pink bead. This will allow you to present to pressured fish without putting them down. Plus, this is a great pattern on high water days as it stands out great in turbid water.
Josh Miller’s secret sulphur nymph can now be added to your fly box. As part of our Tactical Anchor collection, this fly is available in two bead sizes per hook size. This will allow you to tailor your drift to the river you fish, ensuring the best presentation. The color combination on this pattern from dark to the orange/yellow in the thorax is a super trigger for fish.
]]>
The Pink Lively Legz Pheasant Tail came to life as I was prepping for the first day of trout season in April of 2021. I wanted to come up with a pattern that had the attractive qualities of the frenchie nymph, but with a more realistic profile, including the legs and wing case. I'm not the inventor of this type of pattern but this is just my rendition of the classic pheasant tail nymph. To my delight, this fly fooled 22 trout on opening day. I've tested it on a couple of streams including Spruce Creek and Yellow Creek to great success. It is an attractor style nymph that works well on stocked trout. Sometimes, you need a "junk" fly in your box to use when nothing else seems to work. The Hot Pink Lively Legz mixed with the UV Pink ice dub really makes this fly stand out to the fish. This fly seams to work best when the water is a little high and off color. I usually keep a dozen of these on standby and many times I've been saved from a thorough skunking. What are you waiting for, tie one on!!!
Hook: Tiemco 5262 #14 or TCO model hook 5262 #14
Bead: 7/64" (2.8 mm) Gritty Tungsten Bead (Gold Grit) or 7/64" Plummeting Tungsten Bead (Gold)
Weight: .015 Lead wire
Thread: Danville 6/0 Flymaster (Fl. Pink)
Tail: Natural Pheasant Tail
Ribbing: Small Copper Wire
Body: Natural Pheasant Tail
Wingcase: Natural Pheasant Tail coated in thin UV resin
Legs: Small Lively Legz in Hot Pink
Thorax: UV Pink Ice Dub
Step #1: Insert the tungsten bead onto the hook small hole first and place securely in the vice of your choice.
Step #2: Take 10-12 wraps of .015 lead wire around the hook shank and shove the lead into the back end of the bead. This will center the bead on the hook, add some additional weight, and add to the overall taper of the fly.
Step #3: Start your thread directly behind the lead wraps by creating a thread dam, then proceed to wrap over and completely cover the lead. Take the thread back all the way to the start of the bend.
Step #4: Take approximately six natural colored pheasant tail fibers and align the tips. Measure the fibers to form a tail about half a hook shank in length. Secure the fibers and wrap your thread forward to the back edge of the lead. Trim the excess pheasant tail fibers.
Step #5: Take a piece of small copper wire and secure the wire to the hook shank on the far side of the hook and wrap back to the base of the tail.
Step #6: Take 6-8 pheasant tail fibers and secure the fibers right at the base of the tail. Wrap the fibers up the hook shank to form the body by taking touching, slightly overlapping wraps. Stop wrapping the fibers 2/3 of the way up the shank and secure with a few tight thread wraps. Trim the excess off clean.
Step #7: Take the small copper wire and counter wrap it up the hook shank with evenly spaced wraps. This will protect the delicate pheasant tail fibers underneath. Secure the wire 2/3 of the way up the hook shank. Helicopter the excess wire off and wrap the thread forward to right behind the bead. Let your bobbin hang. We are now ready to tie in the wing case.
Step 8: Take 15 pheasant tail fibers and trim the tips off. Place the tip end of the fibers at the back edge of the bead and secure the tips with wraps of thread. Wrap the fibers back to about the halfway point on the hook shank. Make sure you go back far enough to cover the front end of the body. This will avoid exposing thread wraps and leaving a gap in your fly.
Step #9: Secure the lively legz by placing the forward pointing portion directly behind the bead and take three tight wraps of threads. Take another three tight wraps of thread behind the first set of legs. Finally, take another three tight wraps of thread behind the second set of legz and let your bobbin rest. Trim off the back set of legs and also trim off the small tab behind the bead. Make sure the legs are centered directly on top of the hook shank.
Step #10: Take an ample amount of pink of UV Pink Ice Dub and form a tight, 3 inch dubbing noodle. Begin by wrapping the noodle around the back set of legs. Next, wrap the dubbing between the set of legs. Build up some bulk here. Finally, take a couple wraps with the dubbing noodle in front of first set of legs. Go light on the dubbing here to make room for the wing case.
Step #11: Pull the wing case over the thorax and secure directly behind the bead. Take several wraps to form a pink hot spot with your thread.
Step #12: Whip finish your fly. Make sure to seat the knot tight. For a more durable fly, do another whip finish and trim the excess thread off clean.
Step #13: Coat the entire wing case and thread hot spot in UV flow resin. We aren’t looking to build bulk, but rather to protect the delicate pheasant tail fibers.
Your fly is now complete and should look something like this...
Thanks for following along with me!!! Jacob
Jacob Gilliland works in the TCO - Boiling Springs shop and is a fly fishing guide for Relentless Fly Fishing. To find out more about Jacob, check out his TCO Fly Fishing bio and his Relentless Fly Fishing bio.
Call TCO at 717-609-0169, ext 5 to book a trip, or contact Jacob via email: Jacob@tcoflyfishing.com.
Most fishermen when they think of Lake Trout they think the only way to catch them is by trolling big plugs and spoons in very deep water. While that is true for most of year, Lake Trout can be caught on a fly.
During the middle part of September when water temperatures start to drop and the days get shorter the Lake Trout move from their deep water holes on to shallow rocky reefs and points to get ready to spawn. The male Lake Trout are smaller than the females and more plentiful. These males range from 5-10 lbs. The larger females can get very big with some weighing well over fifty pounds.
I had the opportunity to fish for these great fish at Scott Lake Lodge in Northern Saskatchewan September 11th through September 16th. I caught this beautiful 41" Lake Trout on the Sage Igniter rod and a matching Sage Spectrum Max reel with a Scientific Anglers floating line in 6' of water. The fly was a simple 3 1/2" olive and white clouser.
I also had the opportunity to catch Northern Pike, the Pike are heaviest this time of year. They know the winter is coming and are feeding aggressively. I caught four over 40" with the largest measuring 43".
This was a great trip and I'm happy to share my experience with you if you have questions or are planning a trip to fish for these giant Lake Trout or Pike. Please feel free to give me a call at the Bryn Mawr shop.
Shop Mark's set up:
Sage Igniter Rod, 9ft 8wt
Sage Spectrum Max Reel 7/8wt
Scientific Angler Amplitude Smooth-Infinity Taper Line, 8wt
Mark works out of the TCO - Bryn Mawr location. To find out more about Mark, please click on his bio link: https://www.tcoflyfishing.com/pages/mark-yocum
The original UV scud was invented by author and guide, Pat Dorsey. I’ve varied some of the materials he used in his original pattern to come up with my own variation. The UV tan shrimp has been a staple in my fly box for over a year now and I have caught numerous trout on this pattern, especially in small freestone streams with limestone influence and spring creeks, but it will work great on tailwaters and anywhere shrimp are present. I also fish this pattern in two different styles. One with a mottled tactical slotted tungsten bead, and one without a bead. I have found both to be just as effective, however the heavier version is more suited for euro nymphing or fished in a tight line system. The version without the bead is better suited for suspension nymphing (strike indicator).
The UV tan shrimp is a simple pattern to tie and looks great in the vice and even better in the water. Overall, the UV Tan shrimp is a great pattern to tie and fish. Shrimp are available to the trout all year round, so it makes sense to fish them often. For me personally, I fish shrimp all year long, especially in the fall and winter. Often, I will fish a double shrimp rig with my olive and orange hot spot shrimp on point with my UV tan shrimp on the tag. All the shrimp I tie are in size 14. That’s my #1 confidence size for this pattern!
Materials List:
Hook: TMC 2457, #14
Weight: .015 Lead wire
Thread: Veevus 12/0 - Tan
Ribbing: 4x Mono
Backing:1/8" Scud back - Tan
Tail/Antennae: Antron Yarn - Tan
Body: UV Ice Dub - Tan
Tools:
1. Renzetti Cam Traveler 2000 Series Vice
2. Rite Standard Bobbin
3. Dr Slick All Purpose Tying Scissors
4. Loon Ergo Whip Finisher
5. Loon Ergo Dubbing Brush
Step #1: Take 14-15 wraps of .015 lead wire around the shank of the hook and secure with tying thread and make several wraps over the lead until the lead is completely covered. When you are done with this step, let your thread rest right behind the eye of the hook.
Step #2: Secure a piece of tan Antron yarn right behind the hook eye by taking a pinch wrap. Slide the material backwards until you have about a hook gap of yarn protruding past the eye of the hook. Continue to secure the yarn down the hook shank and into the bend. Stop between the back edge of the hook bend and the barb. Trim the yarn to length. The length of the tail and the antenna should be equal to or slightly shorter than the gap of the hook. Wrap your thread back to about the hook point.
Step #3: Secure a piece of 4x mono to the far side of the hook and wrap back to the base of the tail. Wrap the thread forward to about the hook point and let your bobbin rest.
Step #4: Secure a piece of 1/8” tan scud back to the hook and wrap back to the base of the tail. We are now ready to start dubbing our body.
Step #5: Take an ample pinch of UV tan ice dub and apply small clumps to the thread to form a small, tapered dubbing noodle. The noodle should be a couple inches long. Dub the body from the base of the tail to just behind the eye of the hook. Apply the dubbing somewhat loose to make it easy to pick out the dubbing for legs at a later step.
Step #6: Pull the scud back over the newly dubbed body and take a couple of thread wraps to lock the material in place. At this step, I like to throw in a quick whip finish or half hitch to make sure the material doesn’t slip out. Cut the excess scud back off clean.
Step #7: Take evenly spaced wraps with the 4x mono up the hook shank and tie off with a few tight thread wraps. 5-6 wraps on a size 14 should produce a nice, evenly segmented body. Make sure to apply enough pressure to make an indent in the scud back for a more lifelike appearance.
Step #8: Whip finish the fly to produce a small, neat head. Your fly is almost complete.
Step #9: Take your dubbing brush and brush out the body. Do this by moving the brush up and down against the body. This will loosen the dubbing and make the fibers long on the dubbed body. Trim the legs to length by making a cut even with the hook point and one cut from the hook point to the hook eye.
Step #10: Apply UV flow resin to the entirety of the casing and cure for 15 seconds with your favorite UV light. Here, I am using my Loon Infiniti Light. Your fly is now complete!!!
Thank you for reading my blog. Please feel free to leave any questions in the comments below.
Jacob Gilliland works in the TCO - Boiling Springs shop and is a fly fishing guide for Relentless Fly Fishing. To find out more about Jacob, check out his TCO Fly Fishing bio and his Relentless Fly Fishing bio.
Call TCO at 717-609-0169, ext 5 to book a trip, or contact Jacob via email: Jacob@tcoflyfishing.com.
]]>
I would like to add that this review is not written after a weekend of fishing with a new rod. I’ve put a lot of fishing days on this stick while employing as many different techniques as possible, using a variety of different fly lines and leader systems to give the best overall picture. This rod has caught trout for me in Pennsylvania, Maryland, Montana, Wyoming, Idaho and Colorado. Now, after an entire year of the Centric being my go-to trout rod for all techniques, I finally feel like I can write a fair and thorough review without jumping the gun or being over reactive about any of my thoughts. I feel like I can also make a solid case as to why a 10’ 4 wt should really be considered for a lot of anglers. If you want to hear a little about my thoughts on how a 10’ 4 wt fits into trout fishing, you can read the explanation below. If you want to cut straight to the chase, scroll down to the rod review.
So, what is it about a 10 ft 4 wt that makes it a viable option for a lot of anglers? The answer is the 10’ 4 wt strikes a wonderful balance between casting a traditional fly line and using modern nymphing techniques. As Euro nymphing continues to gain traction in the fly fishing world, I think 10’ 4 wts could replace the 9’ 5wt as the most versatile trout rod in many regions of the country where wade fishing is prevalent over drift boat fishing. The 9’ 5wt got the distinction of “best all around rod” before European nymphing became prevalent, and because tight line nymphing tactics seem to be here to stay, a 9’ 5wt may no longer be the most versatile rod as more and more anglers are looking to get into Euro nymphing. When compared to the purpose built Euro rods, a 10 ft 4 wt will have a few inherent drawbacks. It may not give you quite as much tippet protection as a two or three weight dedicated nymphing rod or allow you to cast the thinnest leaders with lighter flies with as much accuracy and control, but if you are willing to adapt a few things, it can still be a deadly tool. In addition to being serviceable tight line nymphing rods, a lot of 10’ 4 wts cast a traditional fly line very nicely compared to their 2 and 3 weight counterparts. I’ve casted a number of 10’ 3 wt nymphing rods with a regular fly line and leader setup and though they can do it, they sacrifice a lot of loop control and have a narrower window of optimum casting performance. They just aren’t that nice to cast a fly line with compared to a classic 8’6” 4 wt and 9’ 5 wt. A 10’ 4 wt is not going to be as sweet to cast as a shorter 4 or 5 wt, but it can handle a much wider range of casts compared to a Euro specific rod while still having loop control and better overall feel and performance. It is also worth adding that some manufacturers do make 10' 4 wts that are purpose built for Euro nymphing, while others are more oriented around traditional casting.
This post spawn brown ate a streamer in late December. Even though it was winter, I caught fish on nymphs, streamers and dries during this outing and was thankful to have such a versatile rod with me that day. |
If there is one thing I want to be clear about, this is NOT a Euro nymphing specific rod, even when compared to some other 10’ 4 weights on the market. This is a rod meant to cast a fly line using more traditional tactics and does so very well.There were numerous days on the water that I was able to fish dries, nymphs and small streamers all in the same outing with nothing more than a leader change or adjustment. That being said, it provides just enough tippet protection and casting accuracy with Euro rigs that I’m confident in my ability to effectively fish it Euro style in the vast majority of situations. If I thought I might be nymphing all day with no chance of a hatch, this rod wouldn’t be my first choice. This is the rod you pull out when you anticipate the need to fish a variety of techniques throughout the course of a day and want to carry just one rod.
As I expected coming from Scott, the 10’ 4 wt Centric is simply an enjoyable fly rod to cast. Being a 10' rod, the optimum range for feel and accuracy is going to be a little further away compared to shorter rods. The extra length can also exaggerate some of your casting mistakes because it is quite easy to veer from your straight line path of your rod tip when making a cast. If you can get used to these differences, you will be rewarded with a rod that performs great and has a little more backbone than a typical 4 weight.
Depending on what your average casting distance looks like and how you may be fishing, you might want to consider different fly lines to get the most out of this rod. Below I break down my thoughts on the lines I experimented with and how they best fit.
SA Infinity Smooth: For close distance casting under 40 ft, this is my preferred line. It is a half size heavy with an extended taper that adds some versatility in terms of mending and turning over larger flies. I normally do not like to over-line rods, and that even holds true with other rods in the Centric series. However, I believe this rod performs much better in close with a 130 grain head (half size heavy) for the first 30 ft. I also find this line works best when fishing streamers and indicator rigs as it helps to turn over the added weight. The long belly helps make it not too aggressive when casting dries at distance. This line is ultimately my top pick, considering the point of a 10’ 4 wt in my eyes is versatility. |
RIO Technical Trout Elite: If you need to make casts beyond 40 ft on a regular basis or simply prefer the rod to perform better at distance, I’d pair it with the Rio Technical Trout. This line has a longer head, and is 122 grains in the first 30 ft. I was able to really gain some control at distance with this line and would highly suggest it if you’re honing in on casting single dries to challenging risers. This line doesn’t provide a lot of feel in close but is still very fishable with lighter rigs. I felt like I sacrificed some versatility with this line, but for the right person in the right situation, I could see this line being the one. |
RIO Gold Elite: This line does the best at striking a balance between the lines listed above and feels right at a wider range of casting distances. If I were just casting for the sake of it, this line feels best. Depending on how you may be fishing, I think making some trade-offs and going with a line like the Infinity will simply open up some techniques by making it easier to turn over larger rigs. |
This was the area I was most concerned with before I picked up the rod. Fast action fly rods, even if they are 10 ft, are not built for Euro nymphing, they are built to cast a fly line. Other 10 ft 4 wts are designed to be heavier duty Euro rods, but I don’t think that’s what Scott was going for here. This rod was clearly built to cast a fly line. Though that’s exactly what I wanted in this rod, I was also hoping that it was versatile enough to handle some Euro nymphing. Here are my key takeaways:
Alex Kolivras landed this trophy brown with the 10' 4 Wt Centric on 5x tippet in less than a minute, proving that this rod can protect lighter gear despite its fast action. |
The range of dry fly sizes you can effectively fish with this rod is everything you’ll need, especially by East Coast standards. Once again, choosing the correct line for the job will be key here, in addition to adjusting leader length and size. I've fished dries with this rod in all 4 seasons including picky midge eaters on glassy winter pools in Pennsylvania, hatches on the Depuys Spring creeks in Montana, and summertime terrestrial fishing from small ants to medium sized hoppers.
This Snake River Cutthroat ate a size 18 dry fly after a few refusals. I utilized a long leader and a slack line cast to make him eat in this slow glassy spring creek. |
I utilized two basic streamer fishing techniques with this rod and had success with both. First, I used a traditional floating line with moderately weighted streamers in the small to medium sizes. I also used a mono rig with anything from micro jig streamers to size 4-6 sculpins, at times, very heavily weighted.
This Pennsylvania brown trout was caught using a streamer on a mono rig with the Centric. The stiffness of this rod is a huge advantage to getting good hook penetration with larger hooks. |
I indicator nymph far less than tight line techniques, but it is undeniable that indicators are the best technique for certain situations. I made it a point to get a handful of days fishing the Centric with indicators where I may have just Euro-nymphed otherwise. I found the rod to be comparable to fishing indicators with a 9' 5 wt, but with the advantages of added reach. I was able to easily open up loops and found the rod threw wool and small airlock indicators with relative ease. I think this rod is great for indicator nymphing in almost any wading situation besides the very deepest and heaviest runs on large rivers that may otherwise call for a 6 weight.
This rod is a good bit heavier than any of my Euro specific 10 ft rods. I think any reel in the 5-7 weight range that isn’t ultra light will be just fine on this rod. I use my Lamson Litespeed -7+, which is definitely a larger reel and feels a touch too heavy for traditional casting, but it balanced the rod well for tight line nymphing techniques. On the high end of reels, I think a Hatch Iconic 5+ or a Ross San Miguel 5-6 would be ideal reels to pair with this rod. If you want to save on your reel, heavier 5 and 6 weight reels in your budget will all work just fine for what you will be doing. I would avoid a Euro specific reel for this rod such as the Sage ESN Reel, as you will want it to be able to hold some backing and a standard 4 weight, or half size heavy fly line. I would also certainly avoid reels made for your typical 4 weight as most will be far too light.
For as much as I did with this rod, there was no way to cover every applicable situation that might pop up.
First, I did not have the chance to fish this rod in stillwater. I think this rod has all the necessary tools to be a great still water rod, especially for dries. I’ll be bringing this one to my next high altitude lake trip when I venture out west as I have every reason to think it would be a great rod for that type of fishing.
I also did not have the opportunity to use this rod in a drift boat. It’s not often that I fish for Pennsylvania trout out of a drift boat but I can still see some applications for this rod. This rod may not have the pick-up power for really big water nymph rigs out of a boat but should fit right in as a light line drift boat rod for certain rivers.
If you’ve made it this far, I appreciate your time as I know this review was long winded and geared for a more narrow audience. With this being a premium price point rod, it is going to be for the serious angler looking for something versatile. The craftsmanship and finish of Scott rods is also something that can’t go unmentioned. These are 100% handmade and designed right here in the United State out of Montrose, Colorado. Please feel free to send me an email if you have any specific questions or feedback and whether you guys would appreciate the long form review for future products.
Thanks for reading!
Frank Landis
TCO Boiling Springs and Relentless Fly Fishing
Instagram: frankflyfishes
]]>The olive hot spot shrimp is one of my most productive flies and one of my absolute favorite patterns to tie. It’s easy, effective, and quite durable. I fish this fly year round, but I find this pattern especially effective in the winter time. Between the months of December and March, this fly is a must have on spring creeks and tailwaters. For me, it's hard to beat a size 14. It’s the size that I’m most confident in and the size that catches the most fish, however it can be fished effectively in sizes 12-18. In addition to the olive shrimp with orange hot spot, I tie a UV tan and dead orange variation to imitate molting and dying/dead shrimp respectively. The orange spot on the olive shrimp imitates a pregnant female and this I believe is the trigger that initiates strikes from the trout. On my local fisheries such as the Yellow Breeches Creek, Big Spring Creek, and Letort Spring Creek, shrimp and other crustaceans are an important food source to trout that are available to them all year round. I never leave home without several imitations of shrimp, but the olive with orange hot spot is a must have in every fly tyers box!
Materials List:
Hook: Tiemco 2457 #14 or Tiemco 2499SP-BL #14
Bead: 7/64” Mottled Olive Plummeting Tungsten Bead
Weight: .015 Lead wire
Thread: Veevus 12/0 - Olive or Light Olive
Ribbing: Ultra Wire - Small Olive or Brown
Backing: Thin Skin Fly Specks - Tan/Black or Sow-Scud Back 1/8" Olive
Tail/Antennae: Sow-Scud Dubbing - Smokey Olive
Body: Sow-Scud Dubbing - Smokey Olive
Hot Spot: Sow-Scud Dubbing - Bighorn Orange
Tools:
1. Renzetti Cam Traveler 2000 Series Vice
2. Rite Standard Bobbin
3. Dr Slick All Purpose Tying Scissors
4. Loon Ergo Whip Finisher
5. Loon Ergo Dubbing Brush
Step #1: Place hook in vice and secure the bead. Place the hook (Tiemco 2457 #14 OR hook of your choice) in the vice and secure the bead (7/64” plummeting tungsten mottled olive OR bead of your choice) onto the hook small hole first. It helps to rotate the hook upside down in the vice, so the hook point is facing up.
Step #2: Add lead wire. Take 7 wraps of .015 lead wire around the hook shank and shove the wire up through the back end of the bead. This will help to add additional weight, center/stabilize the bead, and help with the overall taper of the pattern.
Step #3: Thread the hook. Secure the thread onto the hook shank directly behind the lead wraps. Take wraps of thread until the thread build up is even with the lead wraps (This prevents the lead from sliding backwards on the hook). Cover the lead completely and move your tying thread back towards the starting point, creating a gentle thread ramp behind the lead. Clip off your excess tag of thread.
Step #5: Cut the tail to length. The tail length should be about the width of the hook gap. Pro tip: Don’t use the tips of your scissors to trim the dubbing. Synthetic fibers will dull the blades.
Step #7: Tie in the casing. Tie in a piece of thin skin (fly specks-tan/black OR casing of your choice) at the base of the lead wraps and secure it all the way down to the base of the tail/antennae. The width of the thin skin should be cut to ½ to ¾ of the hook gap.
Step #8: Start dubbing the body. Create a thin, slightly tapered dubbing noodle on the thread using the same dubbing that was used to create the tail/antennae (Wapsi Sow/Scud-Smokey Olive OR dubbing of your choice). Dub the body by working the noodle from the base of the tail to about the hook point. Pro tip: Apply the dubbing loose so that it is easier to pick out the legs in a later step.
Step #9: Dub a hot spot. Take a small pinch of dubbing (Wapsi Sow/Scud-Bighorn Orange OR dubbing of your choice) and make a short slender noodle on your tying thread. Dub a hotspot directly above the hook point.
Step #10: Finish dubbing the body. Take another pinch of smokey olive dubbing and make another dubbing noodle on your tying thread. Continue dubbing the body from the hotspot all the way up to just behind the bead. Make sure to leave a little room to tie in the thin skin and the wire.
Step #11: Pull the casing over the body. Pull the thin skin up and over the body and secure with a couple wraps of thread. Two material locking wraps in front and behind should be enough to hold it in place.
Step #12: Trim the excess thin skin off. Cut the thin skin off at an angle to eliminate bulk. Take another thread wrap or two to further secure the casing.
Step #13: Bring the wire forward. Segment the body by wrapping the wire forward with open spiral, evenly spaced wraps. On a size 14, you should be able to get 6-7 segments. Helicopter the excess wire off.
Step #14: Whip finish the fly. After doing a 4-5 turn whip finish, cut your thread close.
Your fly is now complete and should look something like this:
Thank you for reading my first fly tying blog. Please feel free to leave any questions in the comments below. Check back next month for another Shrimp pattern!
Jacob Gilliland works in the TCO - Boiling Springs shop and is a fly fishing guide for Relentless Fly Fishing. To find out more about Jacob, check out his TCO Fly Fishing bio and his Relentless Fly Fishing bio.
Call TCO at 717-609-0169, ext 5 to book a trip, or contact Jacob via email: Jacob@tcoflyfishing.com.
]]>
I’ve put together a few tips to help you enjoy this hatch and hopefully achieve success!
A head lamp will undoubtedly be used during this hatch. The most important part of the headlamp is realizing that you only use it when looking at the near bank, and not into the stream or at other angles! Make your way to the bank before blasting your light- just because you’re done fishing, doesn’t mean other anglers are! Make sure you have fresh batteries installed and remember to turn it off when you don’t need it.
Princeton Tec Byte |
Nothing is more frustrating at night than tangles. While a 10’ or 12’ leader tapered to 6x or 7x may be the choice for morning tricos or midges this time of year, leave these at home when fishing the whiteflies! A 7.5’ nylon leader to 4x is perfect for casting size 10-14 dry flies. The fish are not leader shy after dark, and the heavier, shorter leader should help avoid tangles. I attach a small sized tippet ring to make adding tippet easier in the dark, they don’t affect the performance, and it’s much easier to use.
Long casts to the far bank are not required for this hatch. Fish will typically be rising all around you. Try to keep casts shorter than 20 feet. The length of your leader and a fly rod’s length of flyline will put you in casting range of a rising fish.
RIO Powerflex Trout Leader |
RIO Tippet Rings |
Please crimp the barbs on all your flies, especially during this hatch, trout inhale the flies without hesitation. Please do your part in helping to save our fish by making it de-barbed. If you miss a fish, you’ll have another chance shortly!
Dr. Slick Standard Clamp |
Dr. Slick Clamp/Barb Crusher |
As always, please consider the water temperatures when fishing this time of year. Just because a huge hatch is coming off, and fish are eating on the surface, doesn’t mean we should take advantage of them. Take water temperatures, and please make sure your thermometer reads 67 degrees or cooler. Anything above 67 degrees will stress the fish. This hatch happens in the evening; however, the water has been super-heated by the August sun and temperatures all day. Please be aware of this before deciding to fish.
Orvis Thermometer |
I like to have white flies in sizes 10,12 & 14 in my flybox. It seems as the hatch goes on longer, the fish focus on the smaller end of the spectrum. Carry these three sizes, and you should be good.
If you want to tie your own white fly, here is the recipe for Neil's EP Trigger Point White Fly Spinner:
Thanks for reading, see you on the stream!
Neil Sunday
Neil Sunday is the Head Trout Guide for Relentless Fly Fishing, operating out of TCO Boiling Springs. A Cumberland Valley native, he can show you a great evening of white fly fishing. Call TCO at 717-609-0169, ext 5 to book your trip, or contact Neil at: neil@tcoflyfishing.com. Follow on Instagram: #neilsunday
]]>Jim recently retired after 23 years of service in the US Army. He's the father of an awesome 6 year old son. Jim's is an avid fly fisher and fly tier. He loves all things related to two-handed rods and spey casting. His happy place would be stepping down through a run swinging flies for Steelhead, Coho, and Brown Trout in the Salmon River.
Jig streamers have become extremely popular as of late. They are super effective and a must have for your box. Whether your tight-lining these through pocket water, or swinging these down through a riffle these flies catch fish. This Peach Jig Bugger is a simple entry into the Jig Streamer game. Like most patterns I tie these require minimal materials and can be tied in a variety of colors and sizes.
This month I'm tying on the Renzetti Cam Traveller 2000 and using some Dr. Slick Tools. The Dr. Slick Bent Shaft Scissors were recommended to me by our own Guide and Bryn Mawr shop employee, Jim Lewis. Jim has very soft, weak hands. He has difficulty picking up things from flat surfaces and claims these scissors have single-handedly improved his tying.Hook: AHREX AFW554 CZ Mini Jig #10
Bead: 5/32 Slotted Tungsten Fl. Peach
Thread: UNI 6/0 Olive
Tail: Marabou Blood Quills Olive
Flash: Krystal Flash Hot Orange/Pearl
Body: Medium UV Polar Chenille Olive
Collar: India Hen Back Olive
Slide the bead on the hook and secure in the vise.
Start your tying thread.
Tie in your marabou for the tail. I like it to be twice the length of the hook shank.
Tie in your Krystal Flash. A few strands will do. The length of the tail or slightly past the tips.
Tie in the Polar Chenille. Move your thread forward. Palmer the material forward using touching wraps up to the bead.
Tie in your Hen feather by the tip. Give it a few turns to create the collar. I prefer the fibers to be just around the length of the hook shank. They should cover the body when the fly is wet.
Whip finish and apply a drop of head cement or UV resin.
Thanks for checking out the blog this month. This is another pattern that I love because it's easy to tie and I can knock out a bunch in a short amount of time. As always, please feel free to reach out with any questions.
Recently our Event Coordinator caught his personal best Rainbow using this exact pattern! See pictures below.
Jim Natiello
jim@tcoflyfishing.com
Published: 22nd March 2022 | Author: Fulling Mill
Fulling Mill is excited to announce the newest addition to our fly box collection: the Guide Box. With a capacity of 672 flies, it’s made from durable polycarbonate with a clear frosted lid, and it features single sided slotted foam. It’s available in Grey, Blue and Red.
This box was designed with boat anglers in mind. For example, while it’s similar to our Stealth Box, it has much more head room. As a result, it holds nearly three times the number of flies.
Dimensions:
It can fit nymphs, medium streamers, and medium dry flies. And, with three colors available you can organize your boxes by fly type, which is ideal for quick fly changes. This is the perfect option for loading all your extra patterns in a boat box or backpack. In addition, this will serve as a great storage box for your extra ties over the winter.
The Guide Box compared to the other boxes in the range.
If you like to have your patterns organized in a bag or boat box, this is perfect for you.
A front view of the Guide Box compared to our Stealth and Pocket Boxes.
It will comfortably fit streamers, as well as nymphs and dries.
The box comes in Red, Blue and Grey.
Fulling Mill boxes have been designed from years of experience and testing on the water, with anglers in mind. In addition, they’re made from an extremely durable polycarbonate with a dense slotted foam. As a result, they can withstand hard use on the water. What’s more, we’re proud to say that they are machined and assembled completely in the UK.
]]>
Slide the bead on the hook and secure in your vise.
Start your tying thread.
Tie in your tinsel.
Tie in a clump of pheasant tail for the tail. A little less than half the hook shank in length.
Two ways to go here. Either use the PT fibers you used for the tail, or pull another 4-5 fibers off and tie them in. Wrap them forward leaving some space behind the bead for the collar.
Counter wrap your tinsel to create a rib. 3-4 open spiral wraps should do it. Secure and trim.
Create a thin noodle with the Ice Dub (less is more!). Make your collar with a few turns right to the back of the bead.
Thanks for looking at this month's fly pattern. My goal is to continue providing fairly simple patterns that don't require a lot of materials or time so you can get on the water and try them out. I tie flies for fishing not for fishermen and love to have easy patterns to fill my box! Please leave a comment below if you have questions, critiques, or suggestions.
Thanks,
Jim Naitello
jim@tcoflyfishing.com
Hook: TMC 3769 #12-16
Bead: 1/8 3.3mm Plummeting Tungsten Beads 1/8" 3.3mm - Copper
Thread: UTC 70 or UNI 8/0 Tan
Tail: Ringneck Pheasant Tail
Rib: Ultrawire Brassie Copper
Abdomen: Hareline Dubbin Hare’s Ear
Thorax: SLF Bug Dub Black
Collar: Metz Hen Saddle Variant
Slide the bead on the hook (crush that barb!) and secure in your vise.
Step 2Start your tying thread. |
Step 3Tie in your wire stopping at the barb of the hook. |
Step 4Tie in a clump of pheasant tail for the tail. A little less than half the hook shank in length. |
Step 5Create a dubbing noodle with the Hare’s Ear (add a little wax to the thread if you’re having trouble). Now take that dubbing noodle to about the ¾ point on the hook shank. |
Step 6Add the wire rib using open spiral wraps to where the dubbing stops and secure the wire with a few turns of thread. Helicopter the wire off. |
Step 7Create another dubbing noodle with the Black SLF. Give it a few turns to create the thorax. |
Step 8Select a feather. The fibers of the feather should only be as long as the distance from the tie-in point to the hook point. Create a tie in point on the feather and secure it. Grab your hackle pliers and give the feather a few turns towards the bead. Secure the feather and trim the excess. |
Step 9At this point you can create a small thread collar. I prefer to take a small pinch of the black SLF and fill it in that way. Give it a whip finish or two and apply head cement if you like. |
|
Thank you for reading my tying blog for the Hare's Ear Soft Hackle. Give it a try and let me know what you think. Please feel free to reach out with any questions!
Jim Natiello
jim@tcoflyfishing.com
]]>
This is a fly I’ve been tying and fishing for a while now. I’ve had a lot of luck using purple flies while fishing for Steelhead, so I thought why not trout? Let me tell you this fly catches fish. This time of year, when fish are near the bottom and the bugs are smaller, it’s the perfect combination for those stubborn winter fish. I like to tie flies that are easy to crank out a dozen or so in a short amount of time. I also like flies that I can fish anywhere regardless of the hatch. Try it and I think you’ll be pleasantly surprised. Follow the recipe below but keep in mind you can tie these in a variety of colors and sizes.
Hook: TMC 2487 #18-22
Bead: 2mm Nickel Tungsten Bead
Thread: Uni-Thread 8/0 Purple
Body: Uni-Thread 8/0 Purple
Collar: Ice Dub, Purple
Slide the bead on the hook (crush that barb!) and secure in your vise.
Start your tying thread.
Tie in your wire. Take your thread down to where the bend of the hook starts and return behind the bead.
Build a taper with the thread. Take thread wraps back and forth along the first ⅓ of the fly. Spiral wrap the wire forward to just behind the bead to form the rib. Secure wire and helicopter off.
Create a small dubbing noodle and create a collar behind the bead.
Finish the fly with a whip finish or two and apply the adhesive of your choice. (I just use two whip finishes on my smaller flies.)
Thank you for reading my tying blog for the Purple Poison Tung Midge. Give it a try and let me know what you think. Please feel free to reach out with any questions! Happy New Year!
Jim Natiello
jim@tcoflyfishing.com
]]>Whether you're driving your Toyota Prius to the office, or you're hauling your Tacoma to the worksite, our vehicles are sacred. We've put together a list of our favorite items to outfit your vehicle for maximum enjoyment. Our buyer, Andy took some time to show us his adventure rig and some of the products that go into it. We've narrowed down the process to three major steps:
The Riversmith River Quiver 2 Banger fly rod carrier is a premium rooftop fly rod holder designed to be light, durable, and incredibly secure for transporting your fly rods.
Having your equipment accessible and protected is non-negotiable for almost any pursuit—and yet typical gear cases aren’t built to stand up to the demands of the outdoors, and lack organizational capabilities. The YETI alternative is the LoadOut® GoBox™ Gear Case. It’s waterproof, dustproof, stackable, and meant to store your must-have tools until you need to get up and go. Built to be nearly indestructible, the ultra-portable gearbox can endure seasons in the sun, negative temps in the field, and the daily abuse of being lugged in and out of the truck, the boat, and the blind.
The Orvis Carry-It-All bag was designed years ago by Orvis Chairman Perk Perkins to be sure his equipment stayed safe and in his possession on flights to fly-fishing destinations.
One of our best sellers for the cooler months, the Harker's Flannel brings buttery soft warmth to the Howler table. We kept it simple enough to be a staple in your closet but added a little Howler vibe with a single button-through flap pocket on the left chest, reinforced elbow patches, contrast stitching, custom metal buttons and a hunter's yoke on the right shoulder.
Any tumbler that’s coming along for the ride needs to be tough enough to keep up. Our Rambler® 20 oz is made from stainless steel with double-wall vacuum insulation to protect your hot or cold beverage at all costs. No freezing mornings or sweltering days will compromise your drink. Comes with the MagSlider™ lid and is available in stainless and DuraCoat™ colors
The YETI Colster® is like a stainless steel bear hug (or can cooler) for your sodas or longnecks. The Load-and-Lock™ Gasket secures your drink in place while the Colster’s double-wall vacuum insulation keeps your beer or soda frosty longer. Plus, it has a No Sweat™ Design, which means you say adios to damp or frostbitten hands.
The ethereal Ultralight Java Drip comes in an ultra-compact design that nests under any standard fuel cartridge, so who says you can,t keep your pack light and drink your coffee too? Step out of your tent and drip-brew some bold, backcountry bliss.
Rumpl makes high-performing blankets that use the same modern, technical materials as your favorite puffy jacket. Rumpl keeps you comfortable anywhere you go, or when you don't go anywhere at all.
Big Agnes' chairs are sure to make you comfy around the campfire or at your next cookout.
]]>
A streamer fisherman's best friend. When you're pounding banks for large predatory trout, you want a fly that makes an impact. Enter the Bank Robber Sculpin. This pattern uses our popular Streamer Stripper hook and the rear portion of the fly is articulated fish spines. A good jerk strip really puts this fly in motion. Warning: Hold on tight.
The Montana Mini Intruder was designed to balance perfectly on the newly popular two to four weight trout spey rods. The mini provides intruder style action in a smaller package. It’s also a perfect prescription when trout get plucky on larger flies.
How was I inspired to take on the most difficult challenge in the hiking world? It all started with a small hike over spring break during my freshman year of college. That’s when I did my first serious multi day hike on the Appalachian Trail. My dad and I completed a section from Duncannon, PA where the trail crosses the Susquehanna River to Boiling Springs, PA. In those couple of days, I became intrigued by the old footpath meandering through the forest; rocks pockmarking a somewhat spongy earth, lookouts atop of vistas, long ridges, misty valleys, and a realization that I wanted more trail. A lot more.
During the next couple of years, I section hiked all of Pennsylvania’s 230 miles of trail. By the beginning of my senior year of college, I decided that I wanted to thru hike the entirety of the Appalachian Trail. All 2,186 miles of it. I also wanted to hike southbound from Maine to Georgia in which only about 10 percent of hikers attempt this route. During my thru hike of the AT in 2014, in a comfy hostel in Monson, Maine, I had a revelation. I had just come out of the 100-mile wilderness. The most remote section of trail. I was soaked to the bone from rain, scraped up, and injured from carrying my 47-pound pack. There was an edition of backpacker’s magazine that featured the Triple Crown. Within a couple minutes of reading that article, I knew what I wanted to do and how I wanted to do it.
My plan for hiking all three major north-south long-distance trails in America was to start the Appalachian Trail right after college in 2014. I planned to hike the PCT in 2016 and the CDT in 2018. To plan for successful thru hikes such as these, one must spend countless hours poring over maps, mapping routes, determining what gear/food one should bring, and figuring out logistics. A general timeline is necessary to avoid snowpack and winter weather. If I had not planned as much as I did, I would probably not have completed the Triple Crown or I would have perished in my pursuits.
Here I will give you a sneak peak of what it was like to hike each trail.
I started the 2,186-mile Appalachian Trail on June 2, 2014. When my parents dropped me off at the base of Mt. Katahdin, I was the most anxious I had ever been in my entire life. Top that off with the high-pitched frequency of buzzing mosquitoes and scurrying of mice (I later found out that the mice had chewed a hole in my peanut m&m’s which ticked me off). When I got to the summit of the mountain and officially started my thru hike, I soaked in the views, and I got a fleeting feeling that everything was going to be alright.
The Appalachian Trail is the most physically demanding of the three. In most places, there is almost know gradual gradient of the uphill sections. Kudos to the ATC for making this trail so intense. The most difficult section of the trail for me was Maine. It was a plethora of rocks, roots, bogs, and…well you guessed it. Bugs. After Maine, the trail was practically a cake walk. I will admit it was an emotional roller coaster in PA because I reunited with my family and then had to leave them a short while later to continue my trek. My first thru hike took me 143 days. I touched the monument on Springer Mountain in Georgia on October 22, 2014.
I started the 2,650-mile Pacific Crest Trail on June 22, 2016. To prep for the higher elevation, I trained in the Chugach Mountain range of Alaska in the winter while I was living there full time. The Pacific Crest trail is my favorite trail to this day. I walked through a variety of landscapes from temperate rainforest, to barren mountains filled with lava rocks, to the high Sierra mountains, to desert. I really loved the fact that this trail was relatively wide open in contrast to the “green tunnel” that is the Appalachian Trail. I also loved the fact that the trail was smooth and graded for horses. Much less physically demanding than the AT but logistically harder. Sometimes, I wouldn’t see humans for 150 miles. It had more of a remote wilderness feeling. Also, the worst feeling in the world is running out of water with no water for the next several miles. Side note: Extra water weight on your back is worth the pain. I completed the trail in 132 days on October 31st, 2016. Two down, one to go.
The last trail I attempted was the 3,100-mile Continental Divide Trail. Known as the “build your own adventure” trail, this footpath has official alternates that you can take to lengthen or shorten your trek. My trek was 2,700 miles long. I did not start my journey until July 2, 2018. The northwest part of Montana got record snows and the snowpack was almost unfathomable. I traveled many miles of snow-covered mountain passes. Thank God for apps like Gut hook that allowed me to navigate across the giant white blanket of Glacier National Park.
On this trail, I have had several shortcomings. On a rainy day in Colorado, I got hyperthermia to the point where I was delirious. A knee injury almost ended my trip altogether. I also endured mental hardship that nearly destroyed me. If it was not for the help of family, friends, and above all else, God, I would not be where I am today. On October 31st, 2018, I completed the Triple Crown of Long-Distance Hiking by touching the monument at the New Mexico/Mexico border. It was done. I had hiked 122 days to complete my final thru hike. Over 7,500 miles of hiking across 22 states.
If somebody were to ask me how I did it, I would simply reply humbly, “I just put one foot in front of the other and repeat.” You can follow my crazy adventures by visiting my blog site at jacobfish.com. God Bless.
Jacob Gilliland works at TCO Fly Shop's Boiling Spring location and is happy to serve all the fellow hikers that walk in the door. If you have questions or want to learn more about the Triple Crown, feel free to reach out to Jacob through his company email here: jacob@tcoflyfishing.com
]]>
This time of year, everyone is asking if the white flies are on the Yellow Breeches. While it’s been a fun Summer of feeding ants, beetles, and grasshoppers to trout- something about casting big mayfly imitations in the evening is a perfect end to the Summer and a casual signal that cooler temperatures of Fall are just around the corner!
The white flies (Ephoron Leukon) seem to draw the biggest crowds and have a certain appeal to fly anglers. One of the biggest challenges this hatch presents is it occurs largely after sundown, meaning the angler is fishing in almost total darkness. We routinely guide during white flies until 10:00pm or later!
I’ve put together a few tips to help you enjoy the blizzard in August! Please let me know what you think!
Bring a headlamp
A head lamp will undoubtedly be used during this hatch. The most important part of the headlamp is realizing that you only use it when looking at the near bank, and not into the stream or at other anglers! Make your way to the bank before blasting your light- just because you are done fishing, doesn’t mean other anglers are! Make sure you have fresh batteries installed, or at least pack them in your fly bag.
Shorten the leader and your cast
Nothing is more frustrating at night than tangles. While a 10’or 12’ leader tapered to 6x or 7x may be the choice for morning tricos or midges this time of year, leave these at home when fishing the whiteflies! A 7.5’ nylon leader to 4x is perfect for casting size 10 dry flies. The fish are not leader shy after dark, and the heavier, shorter leader should help avoid tangles. I attach a small sized tippet ring to make adding tippet easier in the dark- they don’t affect the performance, and it’s easier than tying a blood knot or triple surgeon's knot to add tippet.
Long casts to the far bank are not required for this hatch. You will most likely have fish rising all around you. Try to keep casts shorter than 20 to 25 feet- you’ll be surprised how many fish you hook!
Debarb your flies
First, please pinch your barbs down on all your flies, not just white flies. During this hatch, trout inhale the flies without hesitation. Please do your part in helping to save our fish, by making it de-barbed. If you miss a fish, you’ll have another chance shortly!
Consider wearing a buff or some type of face mask
We’re not talking about wearing a face mask outside for COVID 19 purposes, but because the hatch is so thick, you’ll be eating whiteflies on a good night! A buff is a great protective layer, unless you enjoy the taste of raw mayflies!
Fish responsibly
Please consider the water temps when fishing this time of year. Just because a huge hatch is coming off, and fish are eating on the surface - doesn’t mean we should take advantage of them. Take water temperatures, and please make sure your thermometer reads 67 or cooler. 68 degrees and above will stress fish out. This hatch happens in the evening, however the water has been super heated by the August sun and temperatures all day. Please be aware of this before deciding to fish.
Neil Sunday is the Head Trout Guide for Relentless Fly Fishing, operating out of TCO Boiling Springs. A Cumberland Valley native, he can show you a great evening of white fly fishing. Call TCO at 717-609-0169, ext 5 to book your trip, or contact Neil at: neil@tcoflyfishing.com .
The white fly (Ephoron lukeon) is a very prolific light cream-colored mayfly that hatches in huge numbers along the banks of the Susquehanna River and a few of its tributaries. The most notable of these tributaries is the Yellow Breeches. Like most things in nature, nothing is absolute, but towards the end of July beginning of August the hatch will start on the Breeches and can last 3-4 weeks. This is one of the last “hatches” of the season on our waters. It provides consistent, at times challenging dry fly activity for 2-3 hours each evening well into dark to close out the summer!
If you have ever fished the white fly in our area or read about it, one fly pattern is synonymous with the hatch; the White Wulff. The pattern is time tested, floats well, most every shop carries them, and they work! What the Wulff is not (for me at least) …quick and easy to tie! I wanted to tie a pattern that; sits flush on the surface, takes advantage of some newer materials and the qualities they bring while weaving some “euro properties” into this pattern that help it stand out in a crowd!
The end result: Tighty Whitey
Starting with the hook in the vice, tie the EP fibers over the hook eye. Secure the EP to the hook leaving 2 hook eyes in length so that you can get a few wraps of the dubbing loop and not crowd the eye.
|
I prefer to use the glo brite in a bobbin as thread for tying in the CDL tail. It provides better control, less wraps and lets you keep the hot spot clean. I use a few half hitches to tie off the glo brite and also take a few seconds and hit the bump with a bit of head cement.
|
Using the white thread again, tie in the rib and use a small amount of dubbing to create a thin noodle. Build up a tapered body and finish with just shy of touching turns of the rib.
|
|
The thorax is created using the CDC and ice dub mix in a dubbing loop. I like to get 2-3 turns in back of the wing and 3-4 turns in front. Once tied off I will use a small piece of velcro to comb out the CDC up into the wing.
|
|